Skip to content
Q is For Quilter
Menu
  • Quilts
  • Quilt Patterns
  • Embroidery
  • Embroidery Patterns
  • WIPs
  • Children’s Books
  • Aprons
  • Other Needlework
  • Crafts
  • Vintage Finds
Menu

Vintage Halloween Screen Instructions

Posted on October 3, 2015September 26, 2016 by Martha

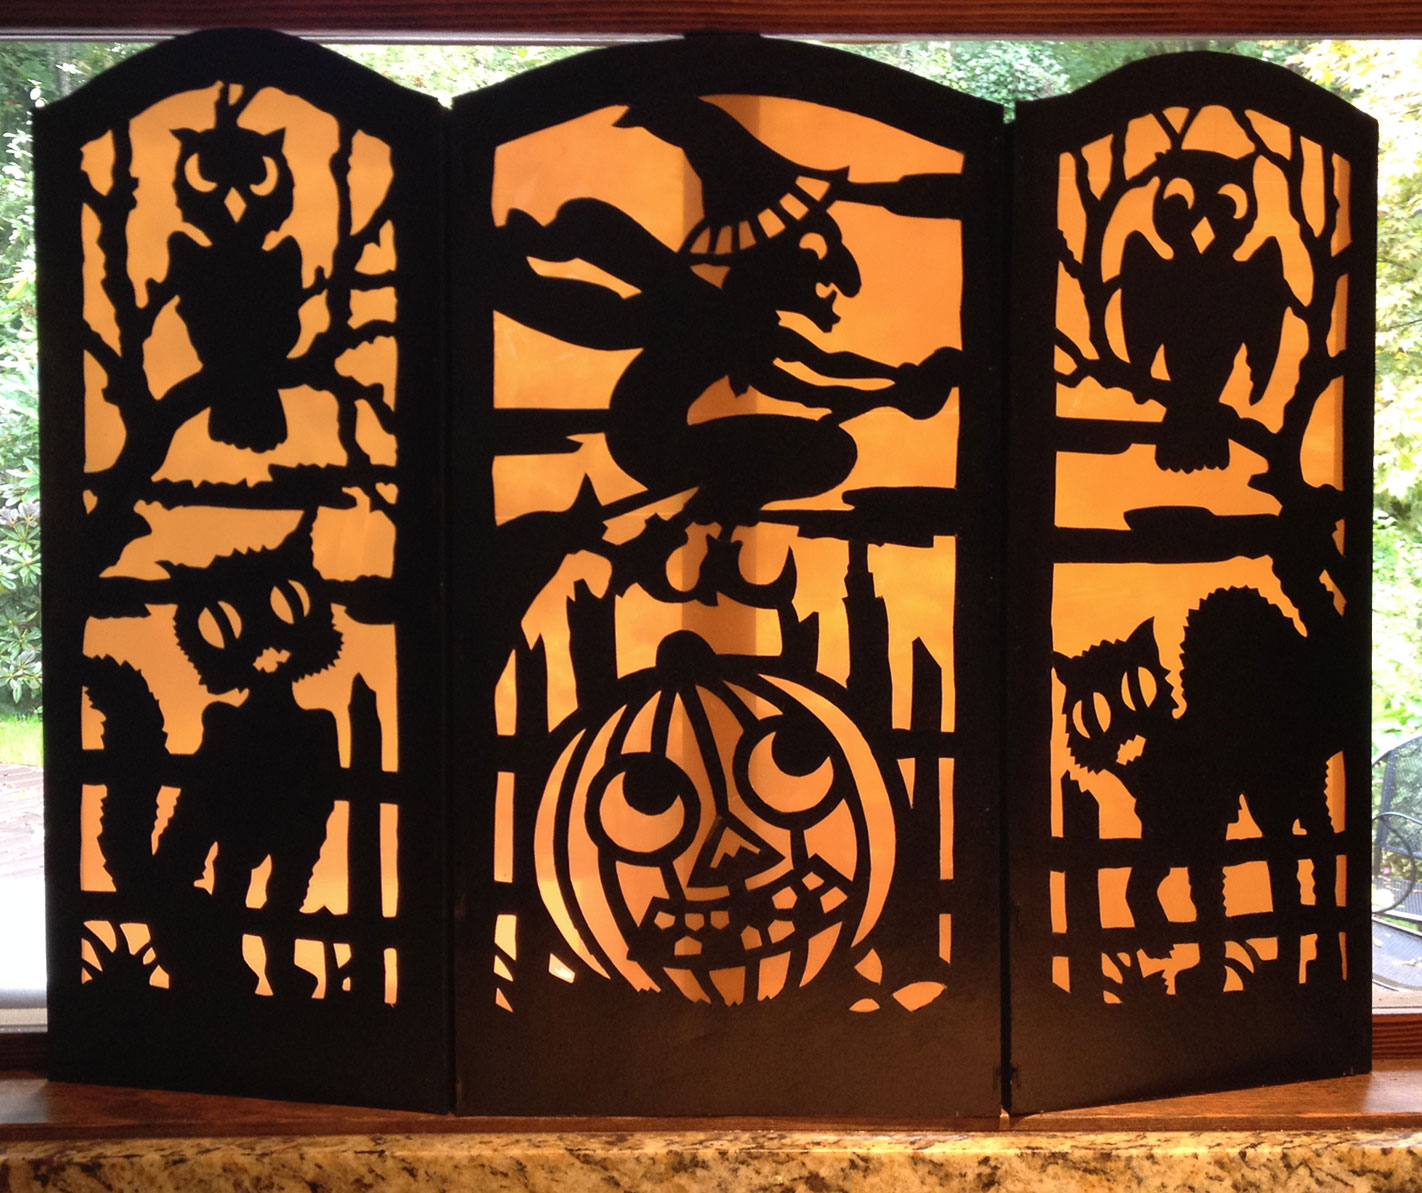
I’ve had several requests from readers who wanted to make the Halloween screen I gave to my sister a couple of years ago, which I copied from an embossed 1920s Halloween decoration that I found online. Since my sister has the screen, I can’t provide detailed photos, but I can give you a pattern, a list of supplies, and some instructions. This is my finished screen.

Vintage-Inspired-Halloween-Screen

It is 24″ wide and 20″ high, which is the same size as the original decoration.

Supplies:
One sheet of heavy black poster board (the Walmart/Dollar Store poster board is too thin)
8 24″ strips of 1/2″ x 1/4″ basswood (available at most craft stores)
small amount of black paint
orange flat fold crepe paper
Xacto knife
spray adhesive
white pencil
white glue
black electrical tape

Instructions:
Click this link to download the pdf pattern. In the Adobe print dialog box, select the poster setting. This will tile print the pattern on 9 sheets of paper (3 for each panel). You will need to trim two sides of each sheet of paper before taping or gluing the sheets together.

Paint the strips of basswood black.

Using an Xacto knife or small scissors, cut out the white sections of the paper pattern, then draw the pattern on the back side of your poster board with a white colored pencil  (if you have some white or light-colored carbon paper, you could use it to transfer the pattern, eliminating this step). Once the pattern is transferred to the poster board, cut out all the interior white sections of each panel with an Xacto knife, then cut the outside lines.

Cut three pieces of orange crepe paper slightly smaller than the three panels of the screen (iron the crepe paper if it is wrinkled — you want it very flat). One at a time, place each cut black panel (right sides down) on newspaper and spray adhesive on the back. Carefully place your cut piece of crepe paper on the back of each section, trying to keep them as flat as possible.

Using a razor blade or sharp knife, trim the strips of basswood to fit the sides and bottom of each of the screen panels. Apply a thin layer of white glue to one side of each basswood strip and position the wood strips flush with the outside edges of each panel — let dry.

Position the three panels face down, pushing them as close together as possible. To make the hinges, apply two strips of black electrical tape to the wood strips along both seams, attaching the two outside panels to the center panel.

I hope this makes sense — let me know in a comment if you have any questions.

  • Halloween
  • 2 thoughts on “Vintage Halloween Screen Instructions”

    1. Neame says:
      October 6, 2015 at 2:23 pm

      Very cute. Thanks for sharing.

      Reply
    2. Sharrieboberry says:
      October 6, 2015 at 9:02 pm

      Thank you for posting this. Your version is amazing!

      Reply

    Leave a Comment Cancel reply

    Your email address will not be published. Required fields are marked *

    A small blog about Martha's quilting hobby.

    More About Me

    Popular Posts

    Categories

    • Quilts
    • Quilt Patterns
    • Embroidery
    • Embroidery Patterns
    • WIPs
    • Children’s Books
    • Aprons
    • Other Needlework
    • Crafts
    • Vintage Finds

    Archives

    • October 2017
    • September 2017
    • August 2017
    • July 2017
    • June 2017
    • May 2017
    • December 2016
    • October 2016
    • September 2016
    • August 2016
    • July 2016
    • June 2016
    • May 2016
    • April 2016
    • March 2016
    • February 2016
    • January 2016
    • December 2015
    • November 2015
    • October 2015
    • September 2015
    • August 2015
    • July 2015
    • June 2015
    • May 2015
    • April 2015
    • March 2015
    • February 2015
    • January 2015
    • December 2014
    • November 2014
    • October 2014
    • September 2014
    • August 2014
    • July 2014
    • June 2014
    • May 2014
    • April 2014
    • March 2014
    • February 2014
    • January 2014
    • November 2013
    • October 2013
    • September 2013
    • August 2013
    • July 2013
    • June 2013
    • May 2013
    • April 2013
    • March 2013
    • February 2013
    • January 2013
    • December 2012
    • November 2012
    • October 2012
    • September 2012
    • August 2012
    • July 2012
    • June 2012
    • May 2012
    • April 2012
    • March 2012
    • February 2012
    • January 2012
    • December 2011
    • November 2011
    • October 2011
    • September 2011
    • August 2011
    • July 2011
    • June 2011
    • May 2011
    • April 2011
    • March 2011
    • February 2011
    • January 2011
    • December 2010
    • November 2010
    • October 2010
    • September 2010
    • August 2010
    • July 2010
    • June 2010
    • May 2010
    • April 2010
    • March 2010
    • February 2010
    • January 2010
    • December 2009
    • November 2009
    • October 2009
    • September 2009
    • August 2009
    • July 2009
    • June 2009
    • May 2009
    • April 2009
    • March 2009
    • February 2009
    • January 2009
    • December 2008

    Search

    © 2025 Q is For Quilter | Powered by Minimalist Blog WordPress Theme