Here’s what I imagine the maker of this UFO was thinking:
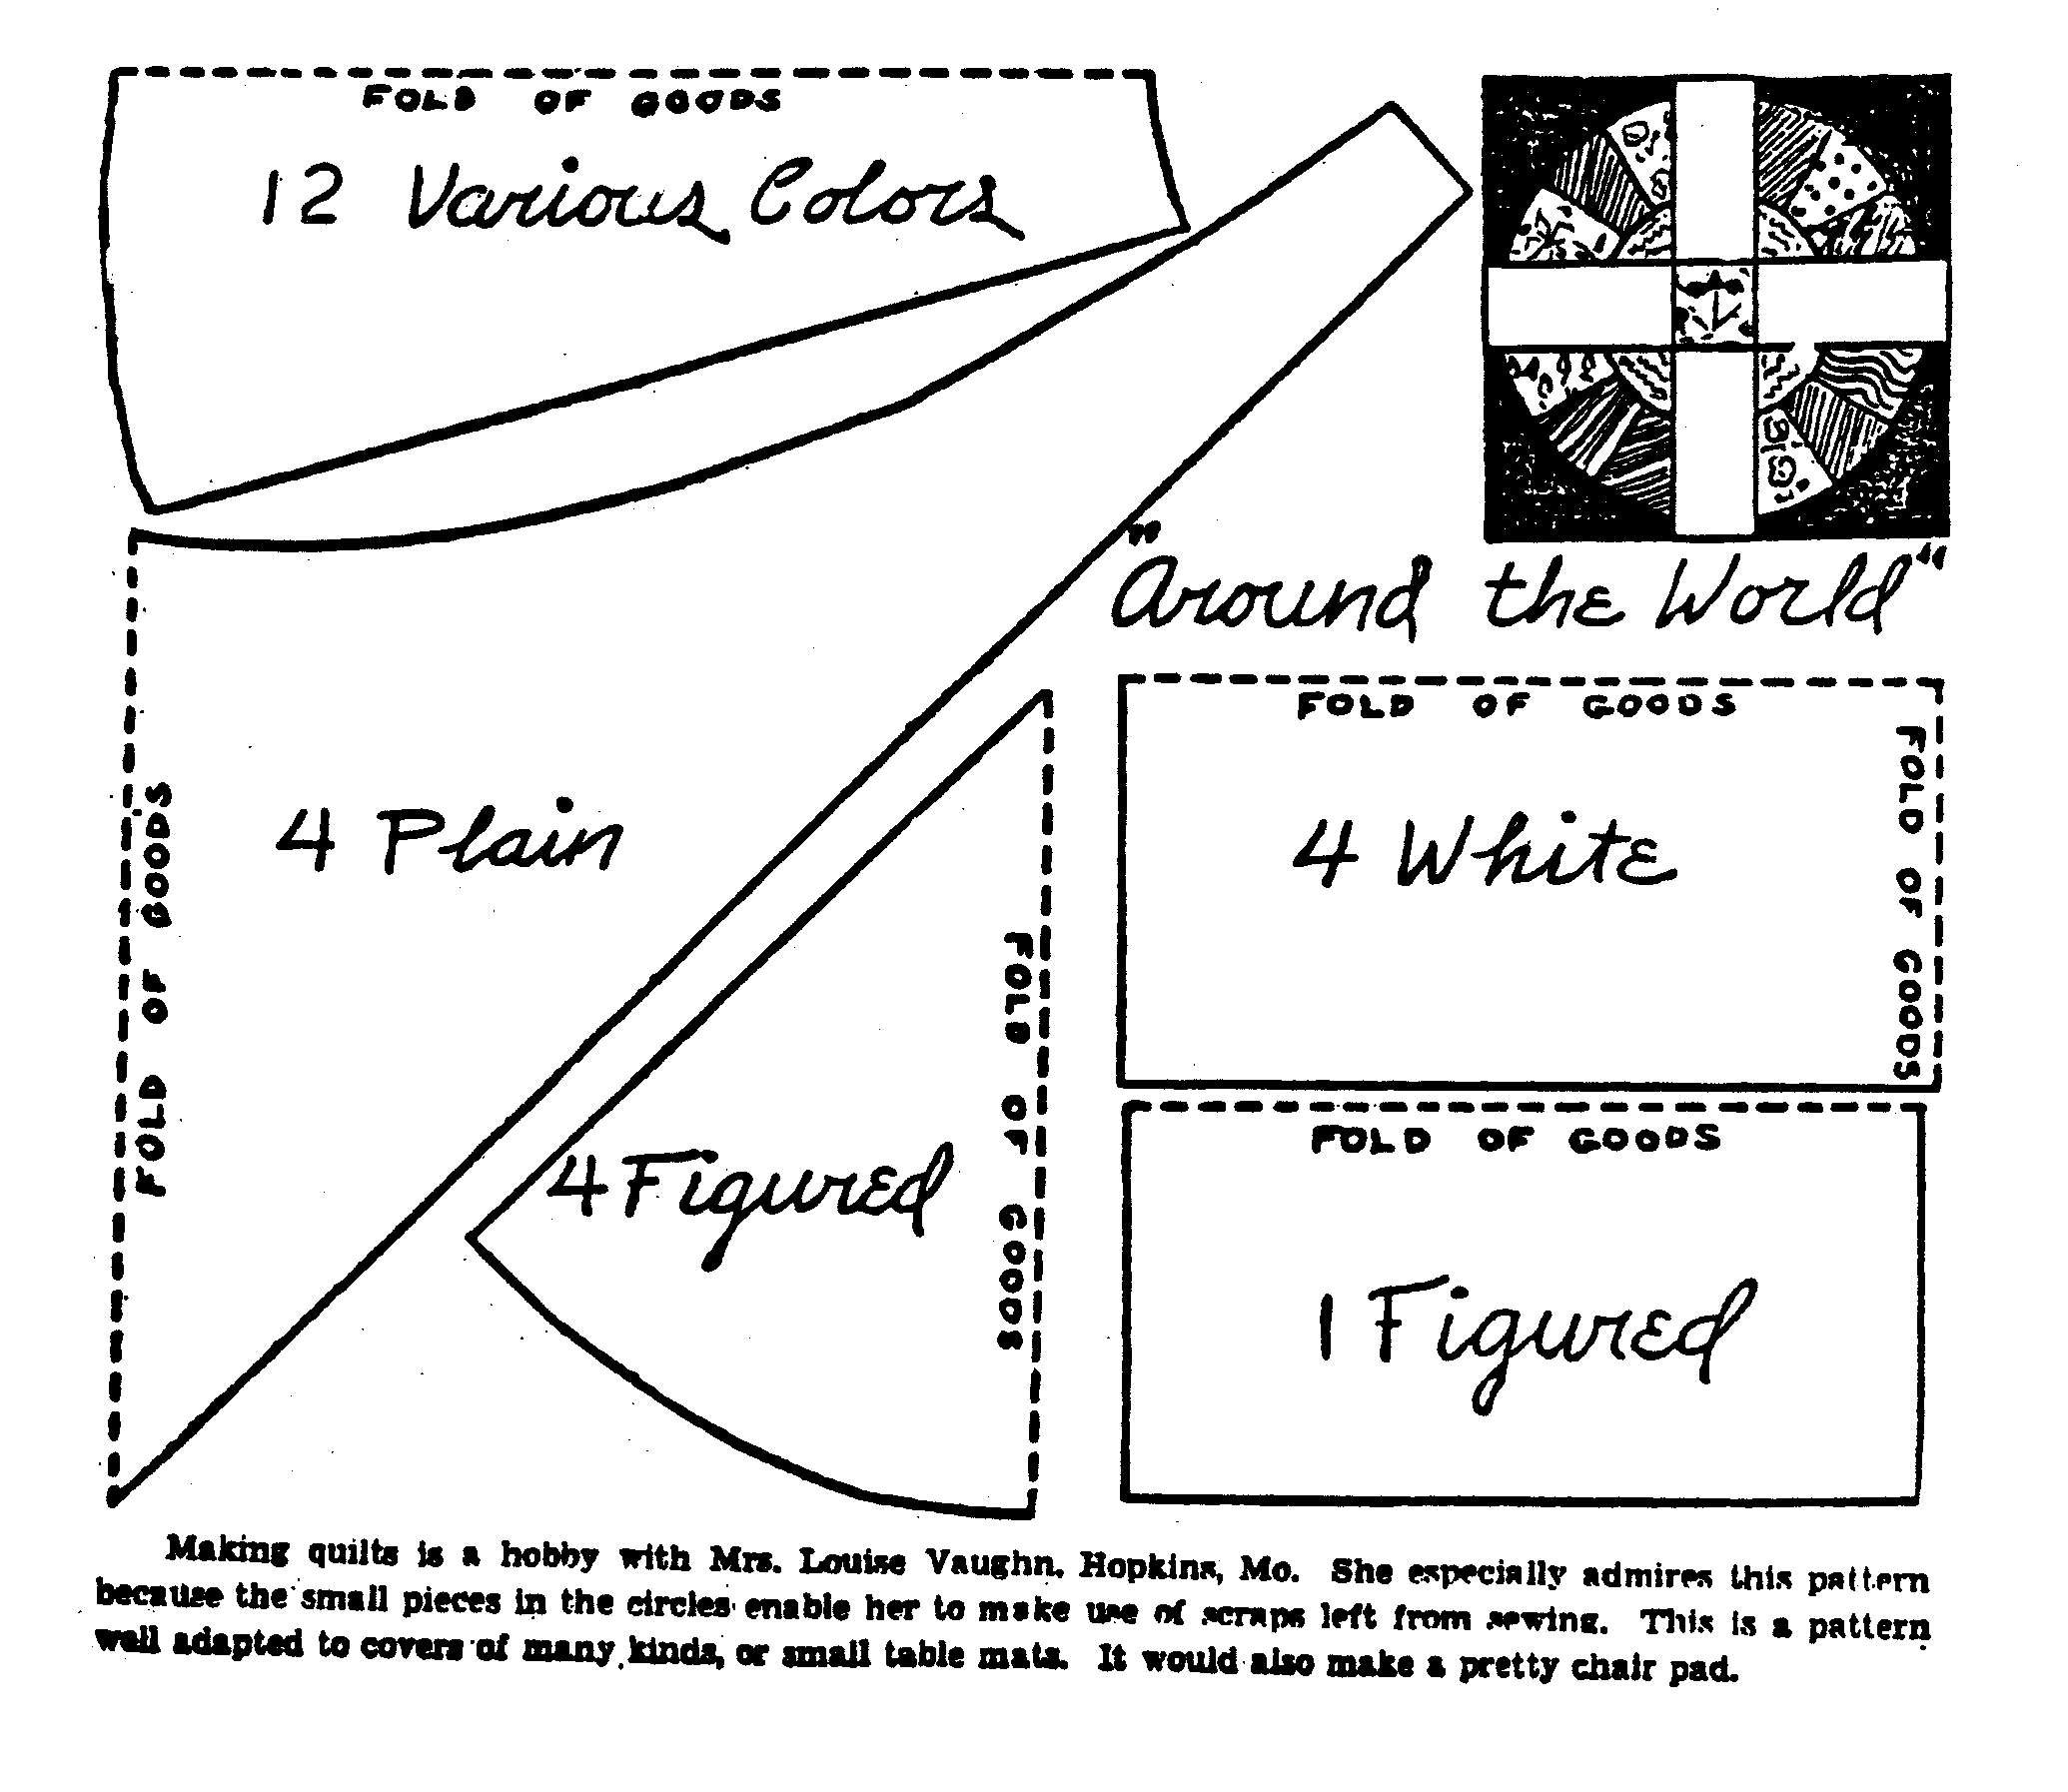
“This Around the World pattern is so cute — I’m going to try it.”

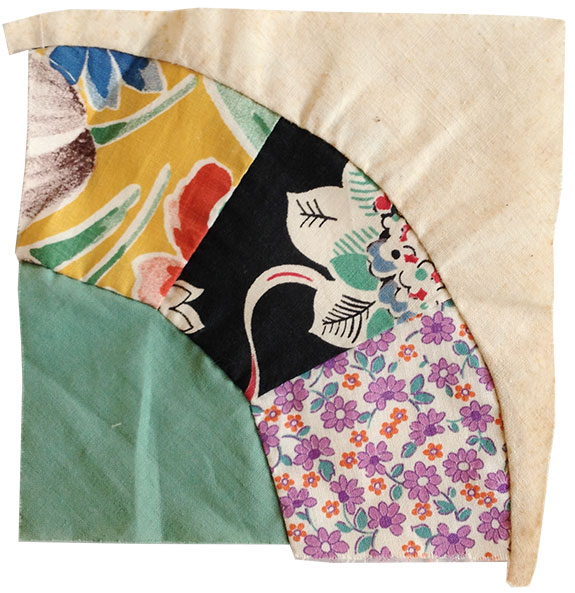
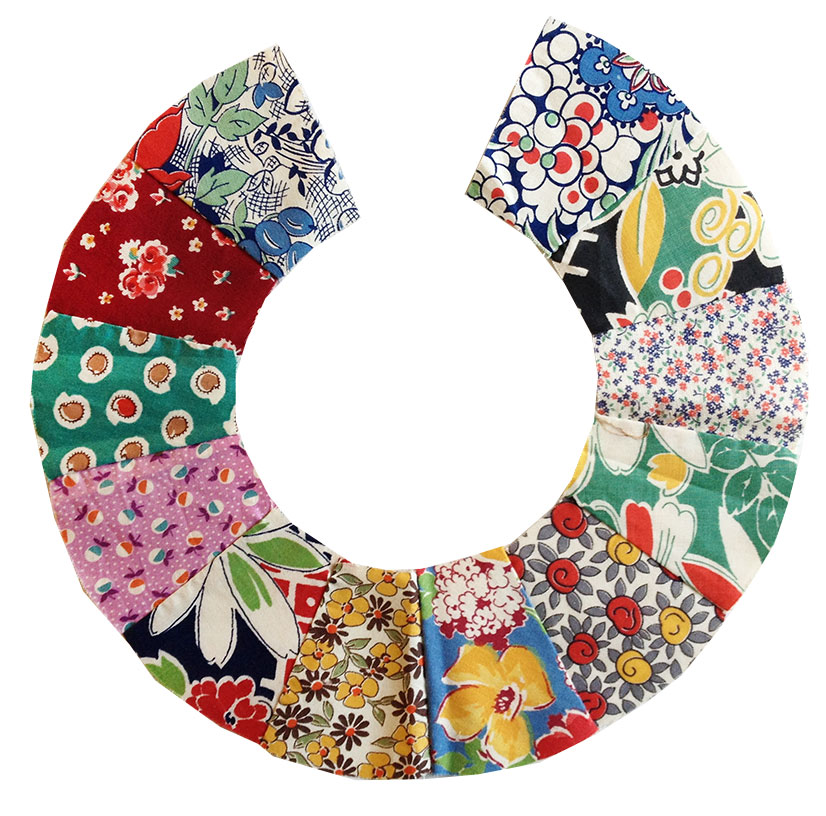
“First I’m going to cut and stitch 192 3-piece arc units.”
“Now to construct a block. Hmmm . . . I like this, but I’m not sure about the purple.”
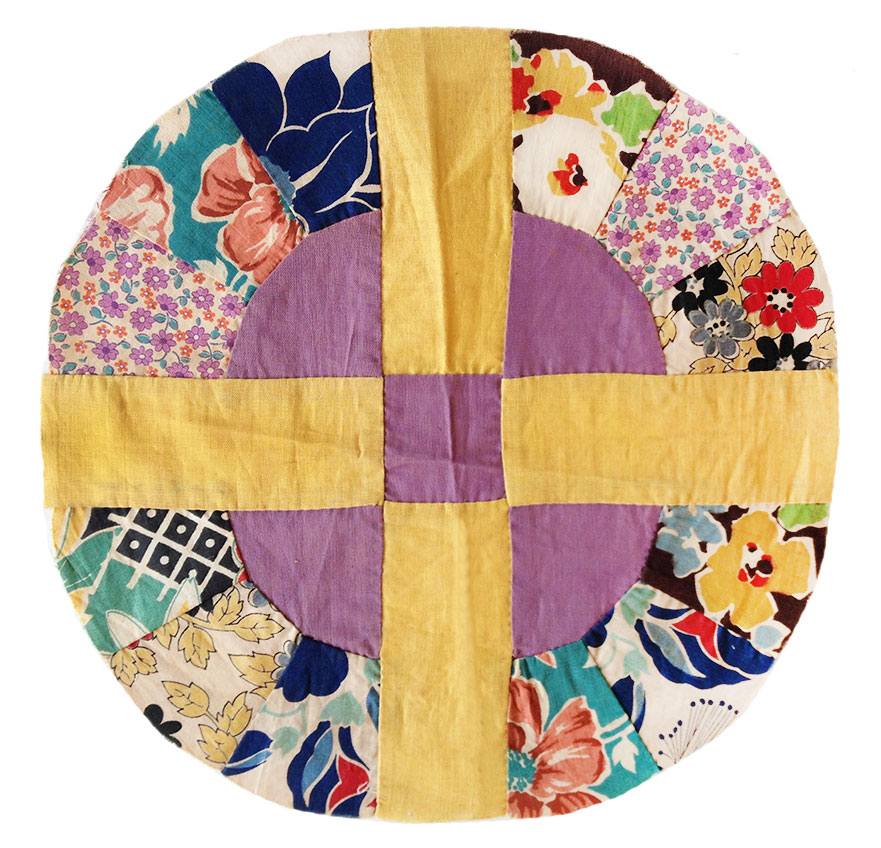
“Oh, I like this green better, but now I have to add those tricky corner pieces.”
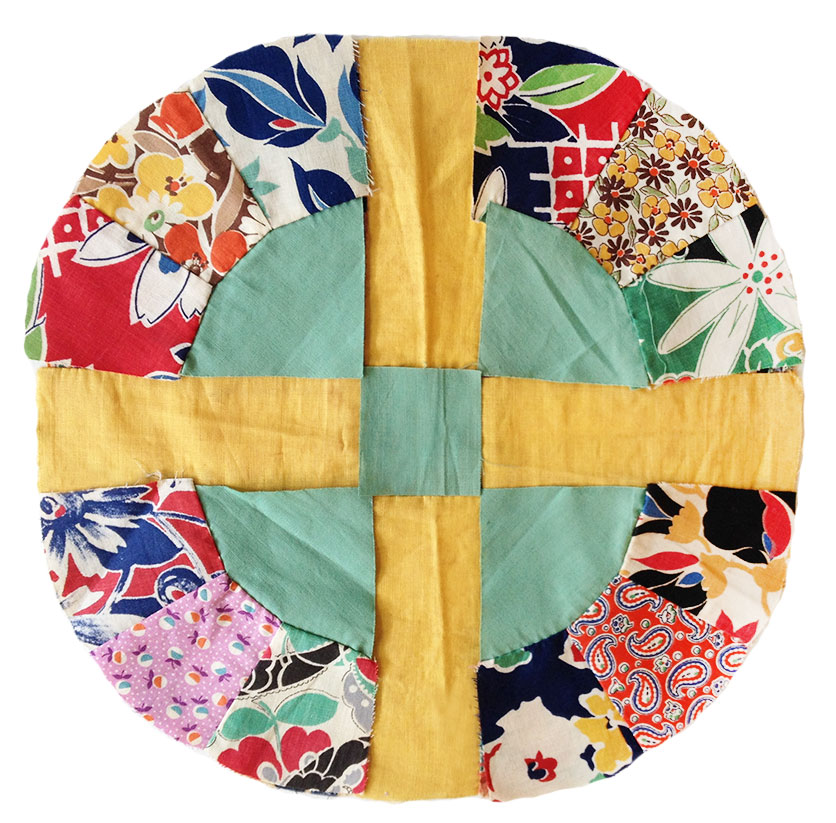
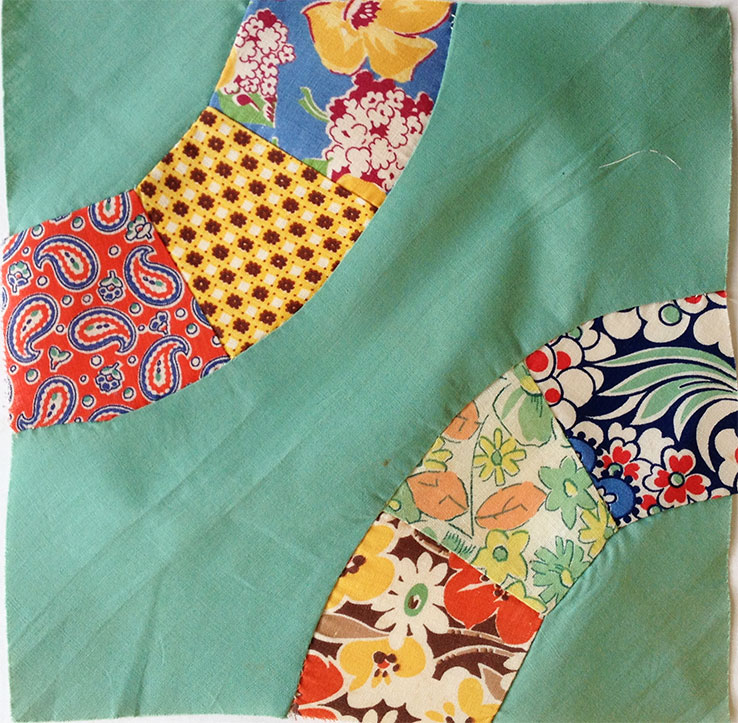
“Okay, this is hard, and the muslin background spaces are going to have a bunch of seams which will make quilting more difficult. There must be an easier way.”
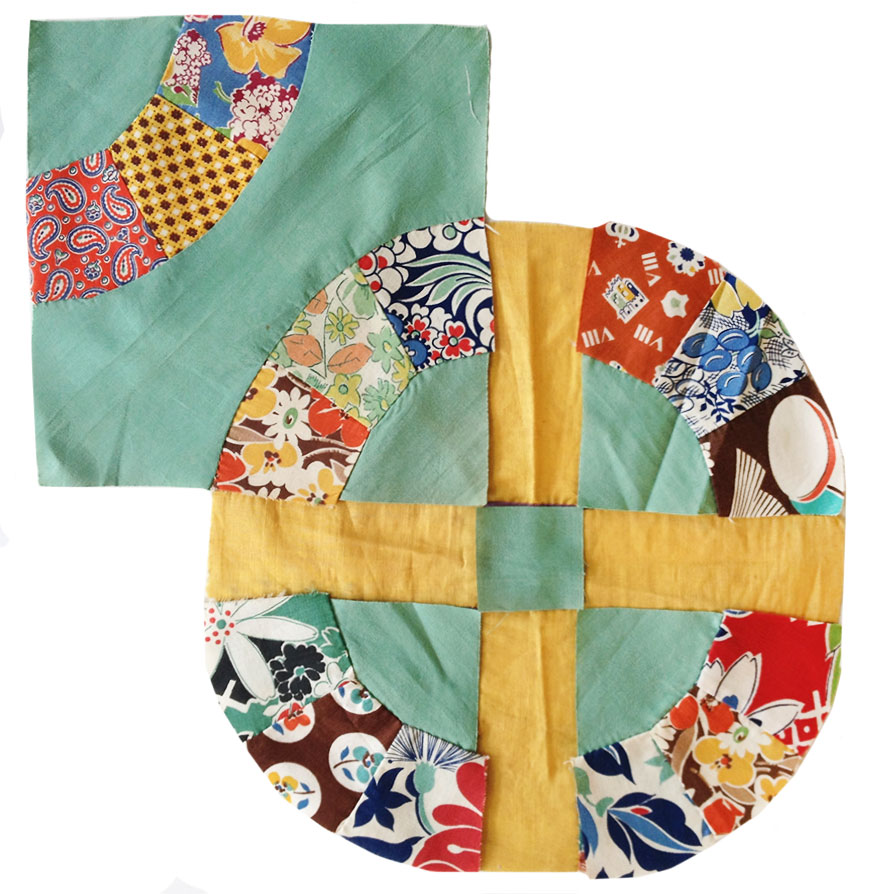
“Will this work? I could make the blocks this way, and add the yellow as sashing with green cornerstones.”
“No, that doesn’t work.”
“What if I just forget about the original pattern, and sew four of the units together in a circle?”
“I give up!”
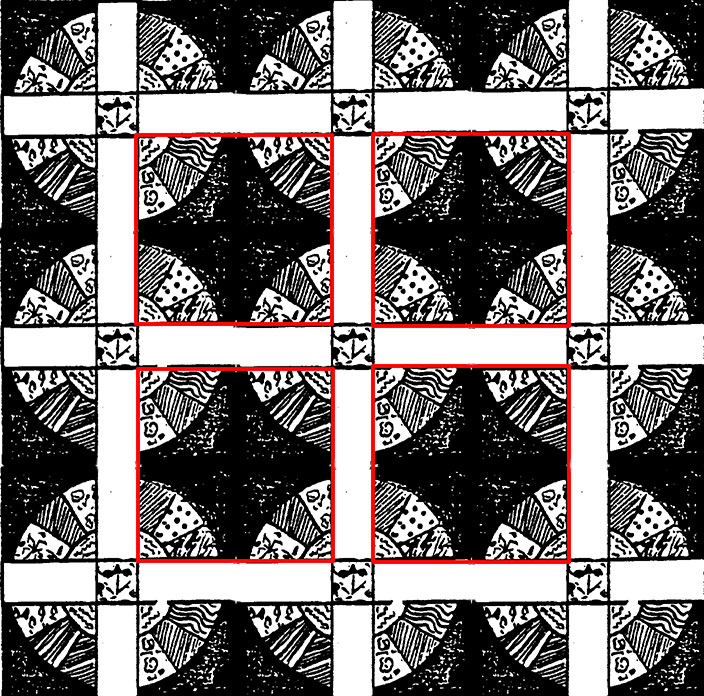
I’ve had plenty of conversations like this, and it wouldn’t surprise me if this was similar to what happened. Instructions were minimal on these old newspaper patterns, and the KC Star patterns had no directions at all. I think if the quilter had drawn a picture of several blocks, she might have discovered an easier way to piece this pattern, because she seemed very close to figuring it out. Of course she could have just appliquéd the block to the background, but that didn’t seem to occur to her. I’m going to piece the quilt as shown below (blocks outlined in red, background one piece without seams). The pattern would probably be called a completely different name when it’s sewn together like this, but what the heck — it looks the same, and eliminates a bunch of seams. Sometimes you just have to think outside the block.
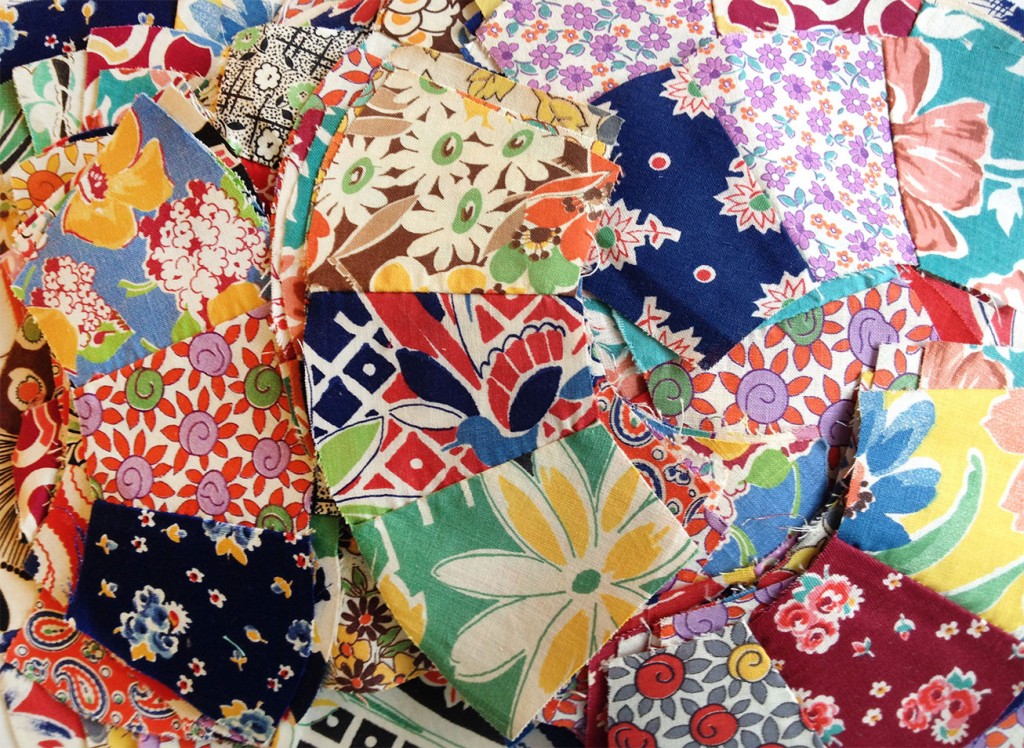
This large group of quilt pieces and partial blocks was purchased on Etsy. Although some larger green pieces were included in the group, there’s not enough to complete the quilt, so I’ll be replacing it with a vintage fabric from my stash. Also, every block and arc needs to be taken apart, re-cut and re-sewn, because the pieces were not cut precisely. My background fabric will be off-white, as the quilter imagined in the fourth photo (I notice that she cut that corner piece with bias edges).
It’s ironic that I depend upon the UFOs of old quilters for my quilt fabric — sometimes I can see that the quilt wasn’t finished because of frustration in attempting a challenging pattern, but many times it’s unclear why the project wasn’t completed. Maybe the quilter died, which is something I think about a lot, being 67 and wondering if I am ever going to be able to finish all the quilts I have in progress. I need to focus and get busy quilting!
I love your thought process! And your collection of vintage fabrics is amazing. Can’t wait to see the finished quilt.
I love your thought process, Martha. Sometimes we do have to think outside the box. The quilters of yesterday came up with some amazing patterns, but the way they were pieced are difficult for us today. So we re-draw them, sew them together, and come up with the same block, but easier for us to put together. The way I would make the blocks are like this– I would make the little Dresden Plate, then sew the curved piece onto it (like a Drunkards Path block).Then I would place a white strip in between two of these small blocks. Then I would make two more of these little blocks the same way, After this I would join these four little blocks together with a white strip in between. Block finished. Same look, different way of putting them together.I am looking forward to seeing yours. BTW-I love the green, too.
Dont you just love looking at someone else’s project? The fabrics are great. You find the best things on Etsy!
Beth F
This post made me laugh, Martha, but as I read through it and saw the photos of the quilter’s attempts at following the pattern I could sense the frustration she might have felt at a pattern with such limited instructions. I can hardly wait to see this quilt finished. You are very dedicated to take apart the stitched pieces, fix them, and stitch them together again. Yet, how wonderful that you are willing to do it and thereby preserve that wonderful fabric as well as make a fine finished quilt.
I love this post! When I made my first quilt, I cut out each 4 inch square by hand and then sewed them all together into a checkerboard pattern. Go figure! Hey, that’s the way it was done! God bless the inventor of rotary cutters and newer methods!
So funny you showed this. I just ran across this version on Pinterest this morning.
http://www.pinterest.com/pin/551550285587828507/
I just finished a quilt using vintage fabric blocks purchased on Ebay. Clearly someone had spent a lot of time making these blocks and for some unknown reason never was able to put them together. They have the most wonderful old fabrics…anyway, it took me years….YEARS!…to figure out how to arrange them and I had to make an additional block from my stash because the quilt was one short…and that block had to not look out of place….and then it took FOREVER to hand quilt it. But it is now, by far, my favorite quilt. I love rescuing these old unfinished quilt blocks and tops and I’m so glad you do too!
I was at the “it’s so cute I have to try it” stage. Copied off pattern and used scraps and encountered problems right after I sewed together three wedges and tried to attach the middle quarter circle. I think I read somewhere that in the old days they used 1/8 inch seams so that might be my problem. Now I’m at the “I give up” stage. But only for awhile.
I love this post! We call these KC patterns “the impossible dreams” because they are so difficult to engineer. I think that the lady didn’t pass on, but just got frustrated. You have more tenacity and skill! I can’t wait to see the finish project!
I am in hopes that some day in the future someone will finish and love my phd’s. :)(projects half done) because I know I will leave many. I love the process of choosing patterns, selecting the materials and the early progress in putting it all together, but, sorry to say, I am not nearly as focused as you are in completing all of them.
I love your desire to make this quilt come together. It will be such an achievement when you finish it – the person who started it would be so grateful and delighted.
I bought a quilt once that was badly pieced and quilted – I undid the minimal quilting and separated the layers, but was so overwhelmed at how badly the pieces had been cut and/or stitched together that I reluctantly put the layers back together. However, instead of quilting it I add another layer of batting to puff out the undulating look of the quilt top (due to the badly cut pieces), and tied it with embroidery floss. It looked a whole lot better than when I bought it and the couple I gave it to were none the wiser and thrilled with their gift.
Good Luck with your vintage quilt – can’t wait to see how you finish it.
Pauline
I love your commentary on the quilter’s thoughts. I have a bin with vintage quilt pieces I may just have to unearth : )
This is fantastic! I love getting glimpses into the making process like this. 🙂 Looking forward to seeing what you quilt ends up looking like!
Lol, you just described my sewing process which is pretty much always in damage control mode, love this post.