
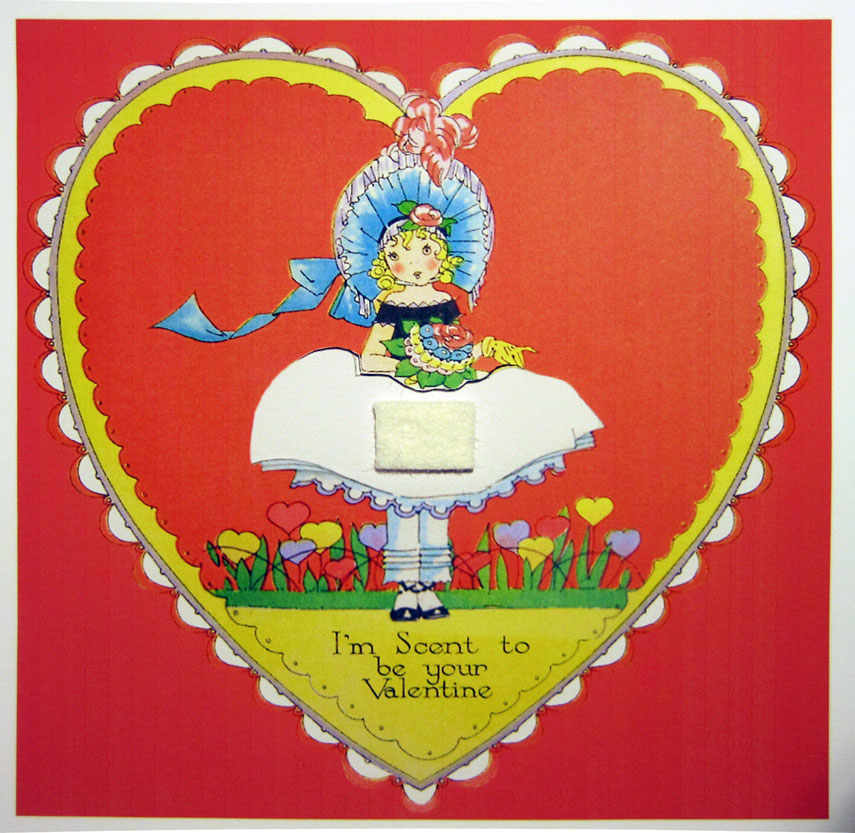
For this project I cleaned up and tweaked a vintage valentine image I found on Etsy. I’ve never seen a valentine quite like this, so I thought it would be fun to try and reproduce it. The idea of putting a little perfume under the skirt really appealed to me, although Gordon thought it was sort of weird.

STEP 1
Click to enlarge this image. Right-click to save the image, and then print it approximately 6″ x 6″ on card stock or mat photo paper.

STEP 2
Use a razor blade or X-acto knife to cut along the line below her bouquet where the skirt will go. The cut should start at the edge of her glove and extend about 1/2″ beyond her elbow. Cut a rectangular piece of white felt (about 1/2″ x 3/4″) and glue it in the white space below your cut. The original card has a piece of white cotton fabric, but the wool felt seemed like a better choice.

STEP 3
Cut a 4″ x 1 3/4″ piece of fabric (I chose a vintage fabric scrap). Turn under and press the raw edges on both ends and the bottom. Stitch the bottom hem (the sides do not need to be stitched), and gather the top edge. Note: Barbara mentions in her comment that she has a card like this which used a handkerchief as the skirt. The original of this card also appears to use a piece of a floral handkerchief.

STEP 4
Slide the gathered skirt into the slit and play with the gathers until you think it looks right. Turn over the card and place a piece of tape over the gathers on the back to flatten them (I used a piece of athletic tape, but you could use anything). On the front place a small dab of glue on the corners of the skirt and press them in place to keep the skirt from shifting.

STEP 5
Now you’re going to cut out the card. Place your card on top of another sheet of whatever paper you are using, and staple them together around the edges.

STEP 6
Cut out the cards together, using a gentle scallop around the edges. Be sure to leave an uncut area on four of the scallops, which is where the two sides will be connected.

STEP 7
Trim the two tabs as shown in the photo below. The front tab is twice the size of the back tab which allows it to fold over the back.

STEP 8
Bend the front tab so that only the red portion shows from the front. Place the front tab over the back tab (making sure the two sides of the card are lined up correctly) and glue the front tab to the back tab.

STEP 9
Trace a heart shape from the front of your card (the yellow heart) and cut two identical heart shapes from colored paper. Glue these to the insides of the card.

STEP 10
Place a drop of perfume on the felt, write a sweet sentiment on the inside, and you’re done!
This is really charming. I have a similar card, and the skirt is made out of a handkerchief. People were so clever back then!
Oh Martha that is beyond sweet – I love the idea of the perfume too!
Thank you so much for this darling tutorial! I’m not very apt with scrapping and card making, but, I’d sure love to give this a try!
Blessings and friendship,
Carolynn ….grammycarolynn(flickr)
Martha, this is absolutely charming! Maybe if someone is allergic to perfume, a small hankie could be gathered temporarily with a running stitch and inserted as the skirt. What a great project! Thanks for sharing. Hope your New Year is a good one. For me I look forward to your great blog in 2012!
Yea! You tried your hand at writing instructions!! See? It wasn’t so bad, now was it! Very cute and very well written.
Thank you for the wonderful valentine image and your directions for a scented valentine. I imagine it’s possible to use the same technique using other vintage valentines, or even designing a card from scratch. Just as charming as can be!
Aww, I love old Valentine Cards.. they were so much better! This is cute.