
Holly and Mickie asked me how I put these tulips together, so here’s my attempt to explain my process, although I realize everyone has their own way of putting a block together — particularly when it involves applique. My technique is baste and pin (no needle turn, no freezer paper), but you can use any method that works for you. Also, I want to show you a big mistake I made on my first block just by being careless.
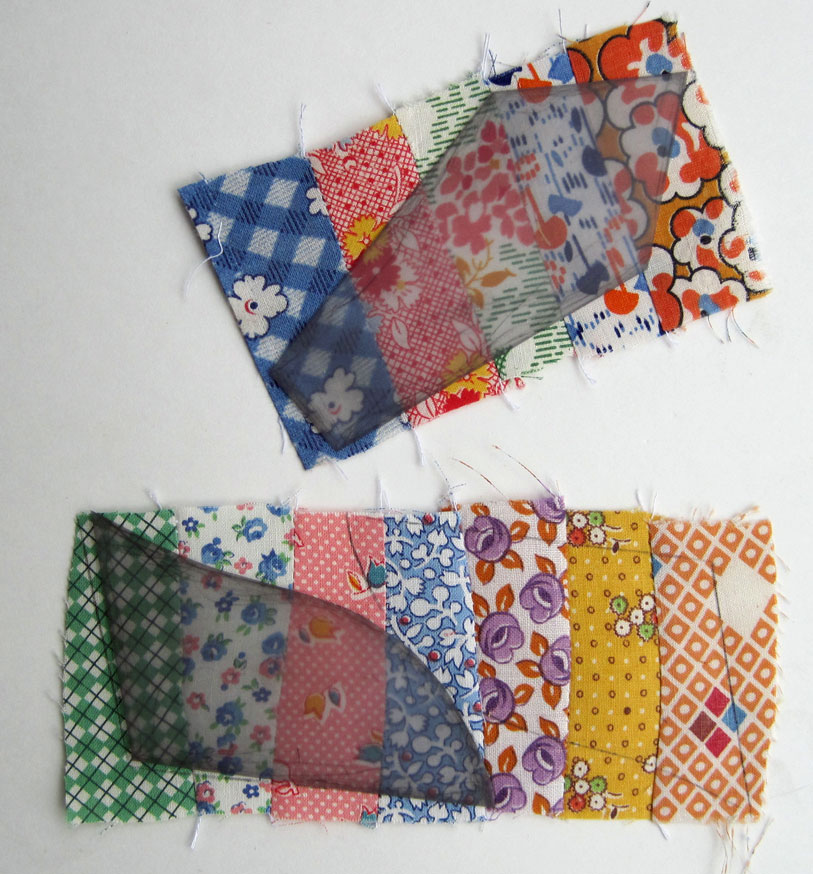
Because I’ve already used up my pre-sewn DWR arcs, I will have to demonstrate with the strip sections I made myself from some old DWR pieces. To avoid waste, I sew together just enough pieces to fit my templates. It’s not important to me how the templates fit, but you must remember to make an equal amount of left and right petals.

Put together your three tulip blossom pieces.

With right sides together, stitch the right and left petals to the center (I use a 3/16″ seam allowance) — stop about 3/16″ from the top and backstitch.

Press the seams open. Starting with your knot on the right side of the fabric, turn in the edges of the tulip unit and baste 3/16″ all around (I do not bother to press first, but use my left thumb to roll over the edge while I’m basting). Fold in the 3 tulip points, and then fold each side toward the middle to make a nice finish on the points. Because you pressed the seams open, it is easy to fold down the top of the seams where the petals meet.

Here’s how it looks from the right side.

Here’s where things began to go wrong. I cut a template to line up the tulip units on the block. I didn’t add any markings or grid lines to the template. As you can see, the 4 tulips fit fairly well into the template, but if you look closely, they really are not placed correctly. Their points don’t line up well across the block, and even though the blocks won’t be right next to each other (since I’m adding sashing), this really bothers me.

Here’s the first block finished (about 9 1/2″), which I am definitely going to redo. Not only is it crooked, but my basting and applique stitching was also pretty sloppy on the petal points — some of them are more curvy than others.

Next time I will draw more detail on the square placement template (duh!) and try to be more careful about making my petals the same. One thing I can’t decide is whether the left and right petals should curve out, or be more straight — I currently have an odd assortment of both. What do you think?
I never would have thought of strip piecing the tulip parts. Good idea. You can use even the small pieces that way.
I love the fact they are all a bit different and what a beautiful block it is. Using your DWR arcs was such a good idea too.
Thank you so much for taking the time to describe the process!
While I love hand stitching, I must admit that the idea of hand piecing a quilt is scary to me! I really need to pluck up the courage to try these tulips. They are beautiful.
I can’t wait to see how all of these tulips look together.
She is only doing the basting and applique by hand. That is not hand piecing (i.e. hand sewing the seams).
Your technique is great Martha. I love the visuals! I like the petals curved out but a mix would be kind of funky too.
Great tulips and tutorial, Martha! That is a neat way to use the arcs and makes the tulips so much fun to look at.
I’m with LoriD. I like the petals curved out, but think a mix would be interesting – give it real life appeal.
Thanks for the tutorial.
I notice that the arcs were handpieced – did you have any problems with the stitching coming undone once it was cut? I have seen this technique done with machine stitched pieces but not by hand. I am glad to see it can be done as I prefer hand piecing.
I like the straighter tulips, but they are both pretty.
I prefer the curving out but I don’t mind the mix of them either since that is what you can see in nature too. But the ones curving out remind me of quilts I saw growing up in PA dutch country.
Thank you for posting your tutorial, I really love this! Not sure when I might be able to tackle it but it sure makes me want to applique!!!
Hugs, Mickie
Great tutorial! I think they look great as they are : )
Did you see this photo of an old cutie. http://www.carolynforster.co.uk/wordpress/?p=345
This is soooooooooo clever! Makes me want to put aside all my current projects and start making a tulip quilt!
I love the pieced applique pieces. It makes the quilt really old-fashioned. I would have folded the base block diagonally and pressed in creases to use to line up the tulips on the background block. I do a lot of folding instead of measuring.
I like your blog.
Another Martha (but not THAT Martha)
These are so sweet! Did you draw your own template? Wish we lived closer so I could come and learn from you and absorb all your knowledge! 😉 Have a great weekend Martha! xo Heather
Very nice love the way it all comes together and not hard at all
I managed to kind of duplicate your templates and made a practice block. Now to make the real thing! Thanks