When I make crepe paper bouquets, I like to include a mix of Dennison type flowers (made with single petals) and ruffled flowers. I’m not going to bother writing a tutorial for the Dennison style flowers, because you can find good directions for these on the Martha Stewart site. There is also a free download of the 1922 Dennison booklet “How to Make Crepe Paper Flowers” on the Antique Pattern Library site.
Of course, I realize that not everyone is going to have a ruffler foot for their sewing machine, but if you do, you really should try this. Maybe I wouldn’t go out and buy an expensive foot just to make these flowers (or maybe I would), but you (or your mother or your aunt) might just have one lying around gathering dust because you (or they) didn’t realize what amazing flowers could be made. There is a good video on how to use the ruffler foot on YouTube.
This tutorial is all about crepe paper streamers, but you can also use flat folded crepe paper (both single and duplex). With flat folds, you can cut the strips much wider, which allows for more elaborate designs; they are also quite a bit more stretchy, providing more molding than you can get with a streamer. However, streamers are super cheap and readily available, so that’s what we’re using today. Remember, crepe paper is very forgiving, so don’t worry if your flower doesn’t look exactly like mine or you make a little mistake. I don’t think I’ve ever thrown one away, and I’m usually pretty picky.
WHAT YOU WILL NEED
- crepe paper streamers (generally 2″ wide, but check a few stores to find variations in color and stretchiness)
- ruffler foot for sewing machine
- paper covered floral wire (I like the light green color)
- Frog Tape – 1 1/2″ wide or whatever width you can find (it’s a green painter’s tape, available at hardware stores)
- glue gun
- 4 small alligator clips
- double-stick tape
These last three you don’t really need, but I use them for some of the flowers
- pinking shears (and those craft scissors with fancy edges are nice, too)
- spray glue (for making duplex streamers)
- stamens or pips for flower center (available on Etsy)
NOW LET’S MAKE A MUM
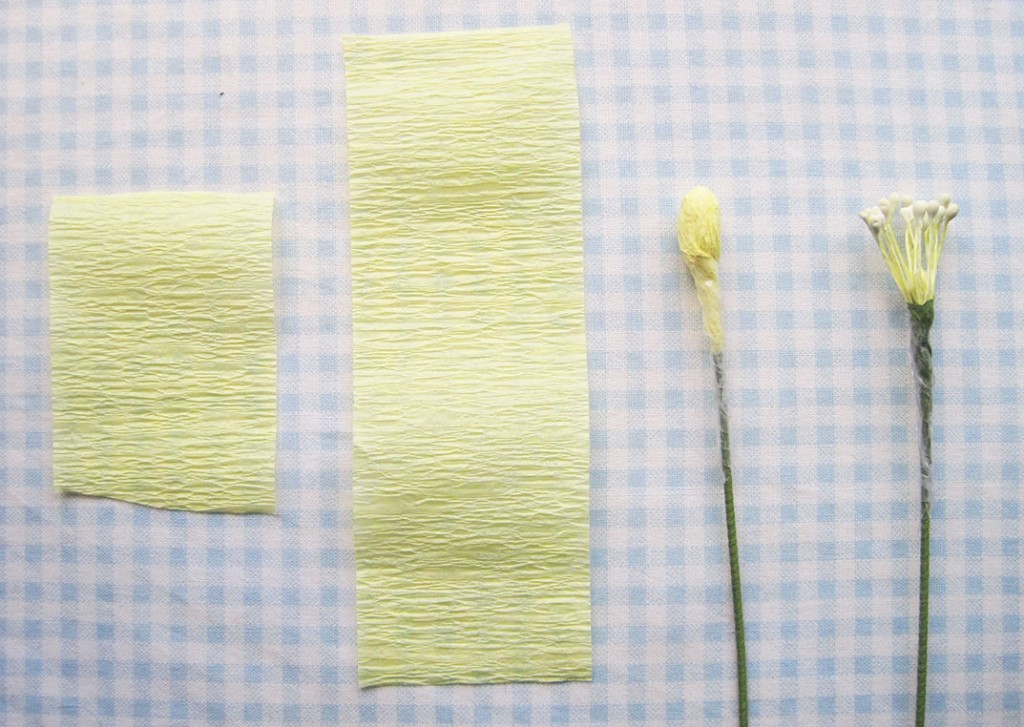
You will need to make some kind of center for your flower. You can use little stamens or pips if you have them, or you can make your own center.
- Cut two pieces of streamer as shown below (2-3″ and 5-6″)
- Wad up the larger piece and place it on the end of your wire
- Wrap the smaller piece around the wad and crimp/twist the bottom with your fingers
- Wind the double-stick tape around the bottom of the ball and extend a couple of inches beyond the ball
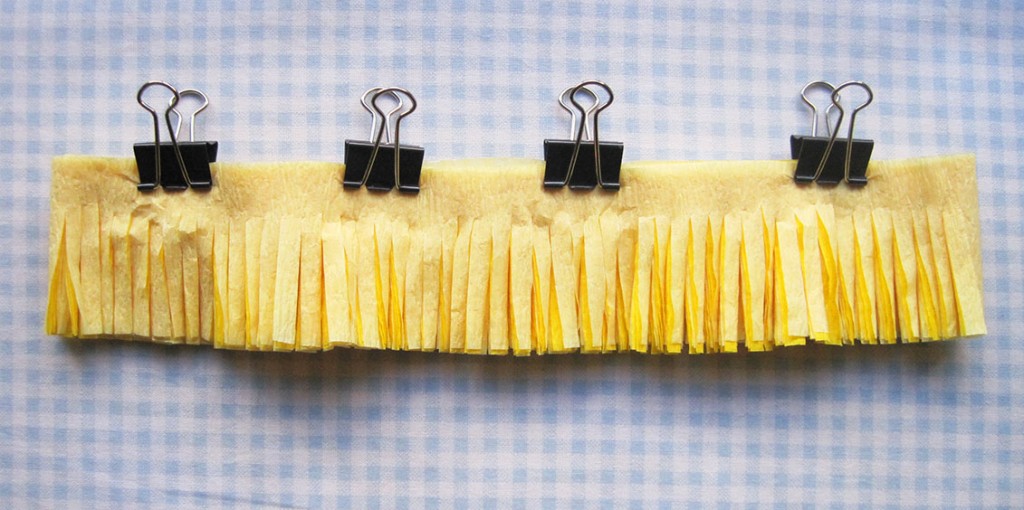
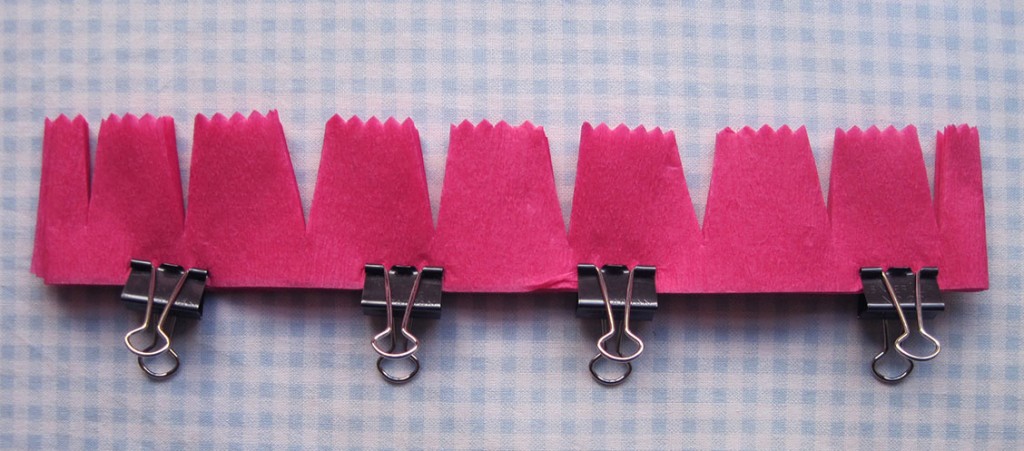
For the mum we are going to use 2 shades of one color. Cut a 6′ long section of each color, put them together, and fold them in half until the length is approximately 9″. Attach the 4 binder clips to one edge to prevent the paper from shifting while you cut. Make your cuts about 1/8″ apart and stop 1/2″ or so from the opposite side.
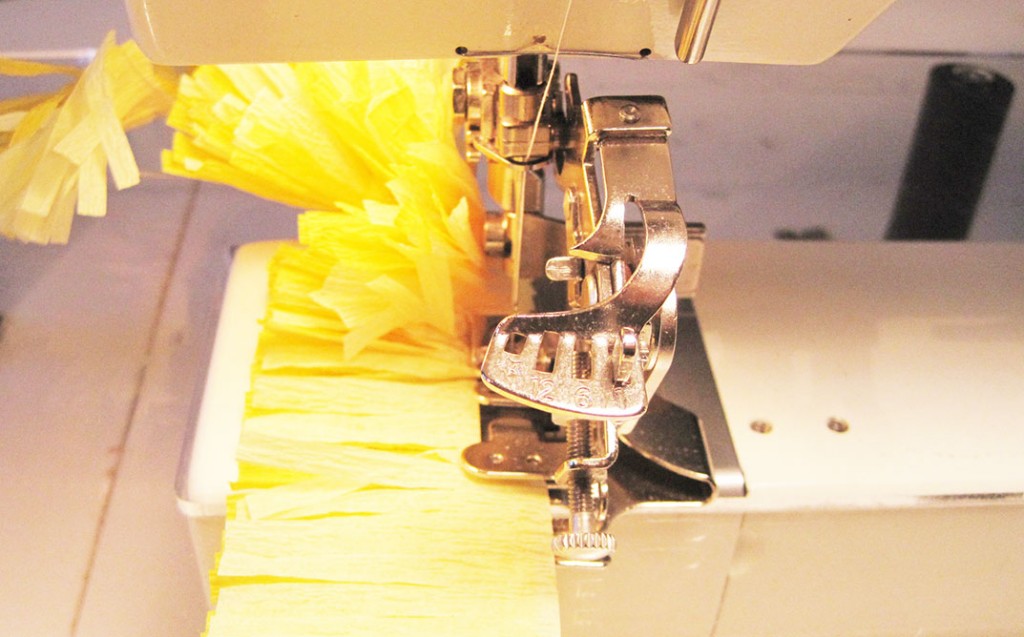
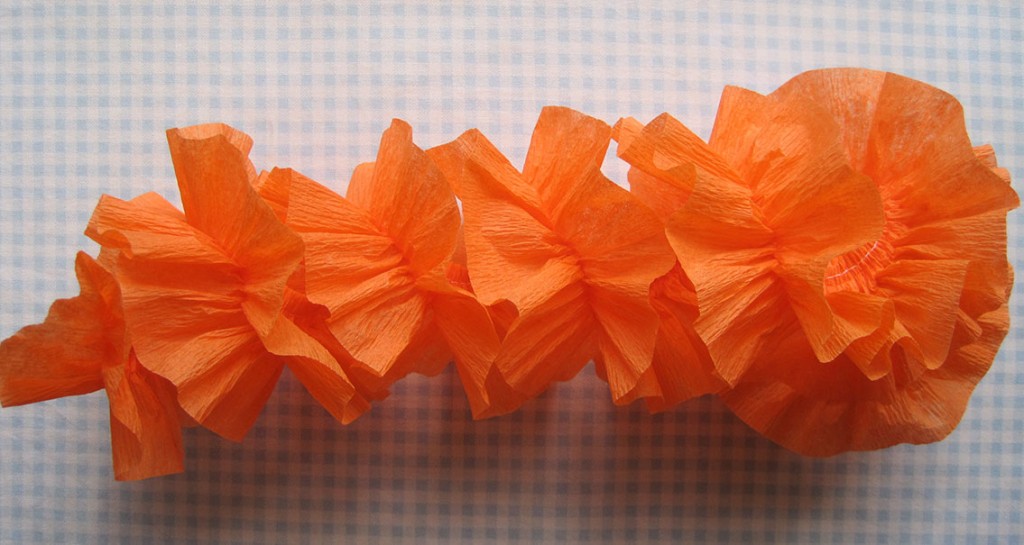
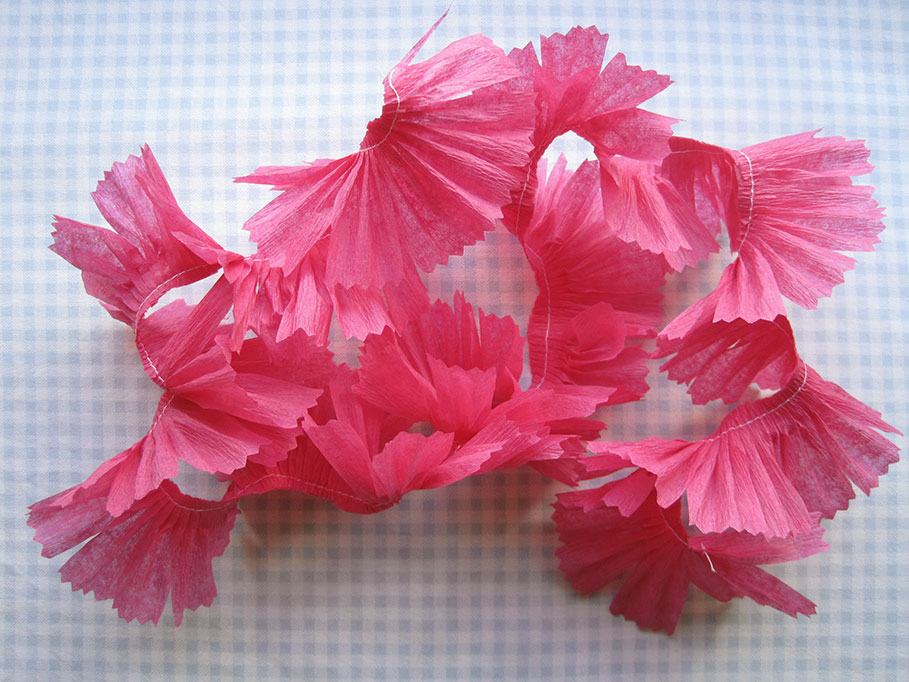
Pull the strips completely apart (this will make the flower puffier) and place one color on top of the other. Set your ruffler on “1” and set your sewing machine stitch length about 3. Begin feeding the streamers through the ruffler — try to keep them lined up and stitch near the edge of the paper.
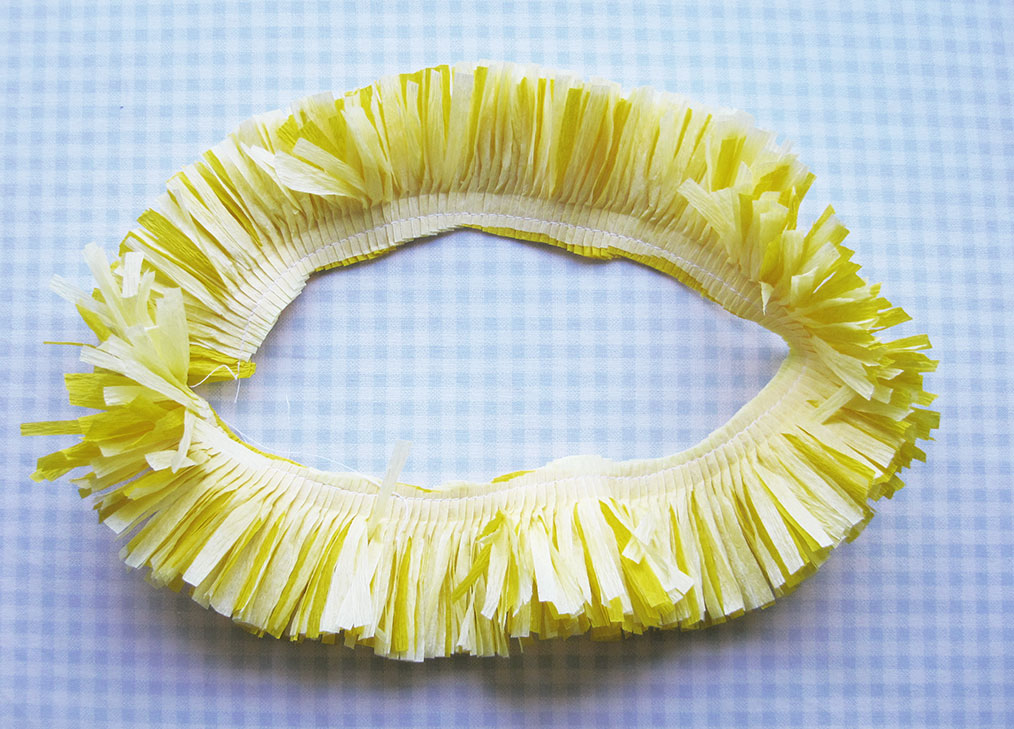
The completed strip should look something like this.
Stick the end of your strip near the top of your double-stick tape, and begin wrapping it around the wire. Attach the end with some hot glue (you can squirt some down inside the hole as well if you want).
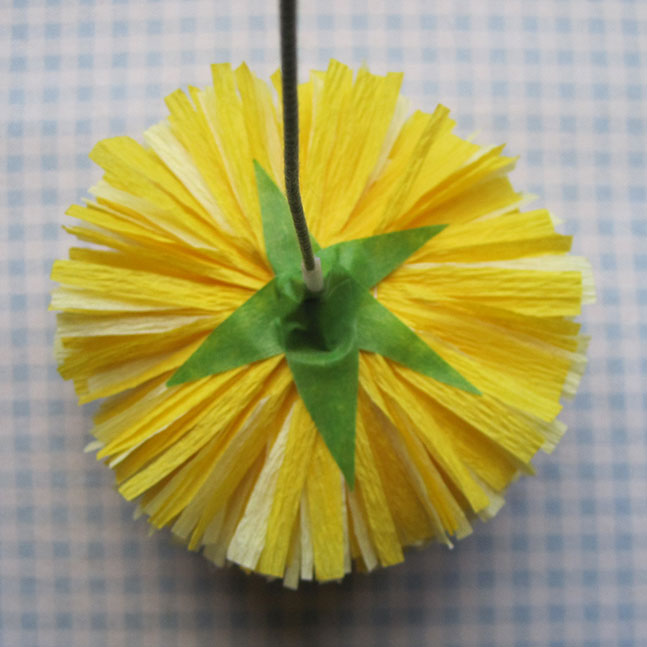
Cut 5 triangle strips from the Frog Tape and stick them to the stem and the flower in a circle to form the calyx. Cut a 4-5″ strip of tape, cut it in half lengthwise, and wrap it around the stem for a couple of inches, starting at the calyx.
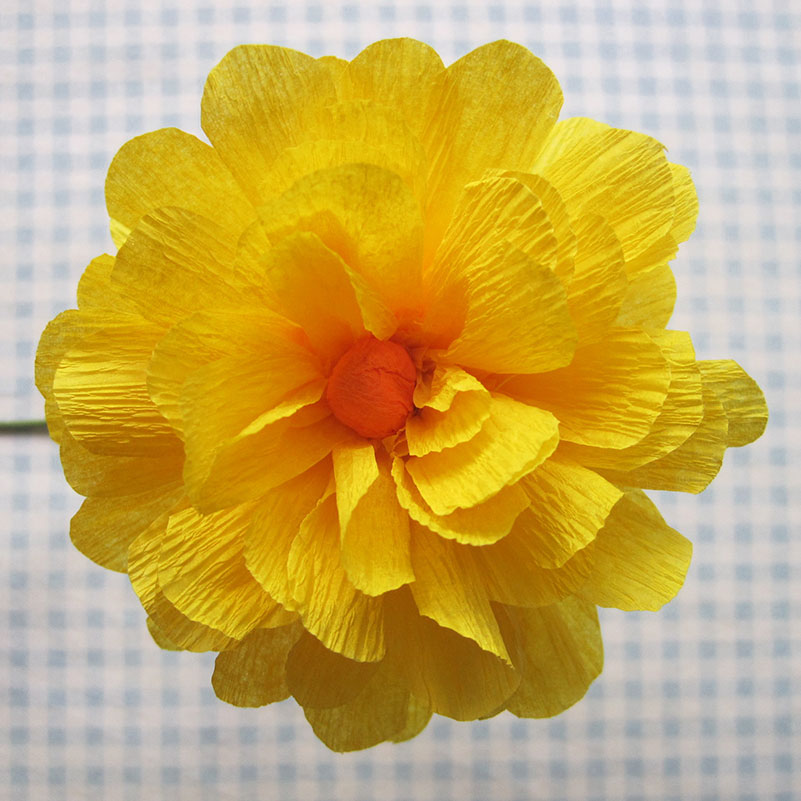
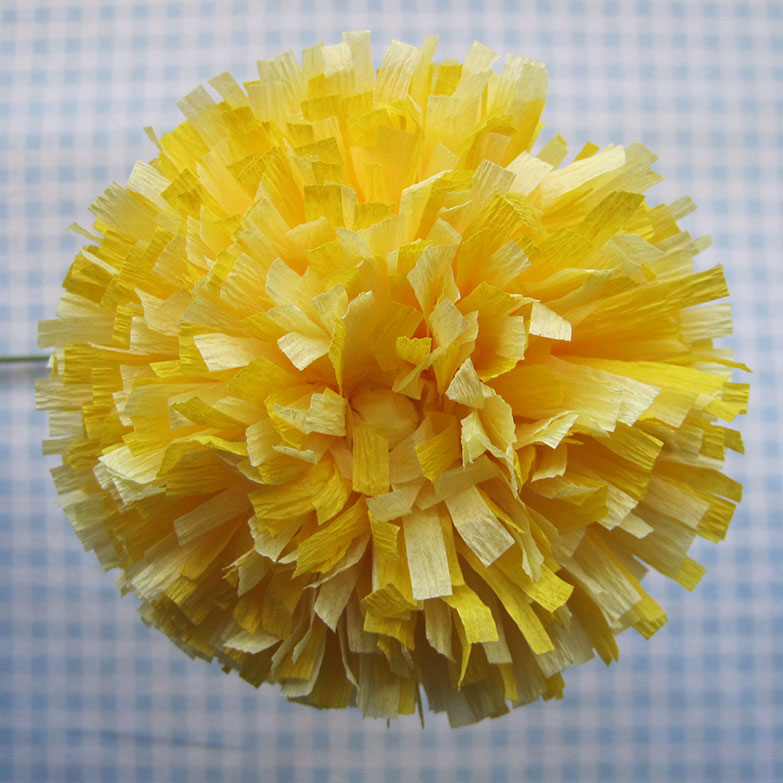
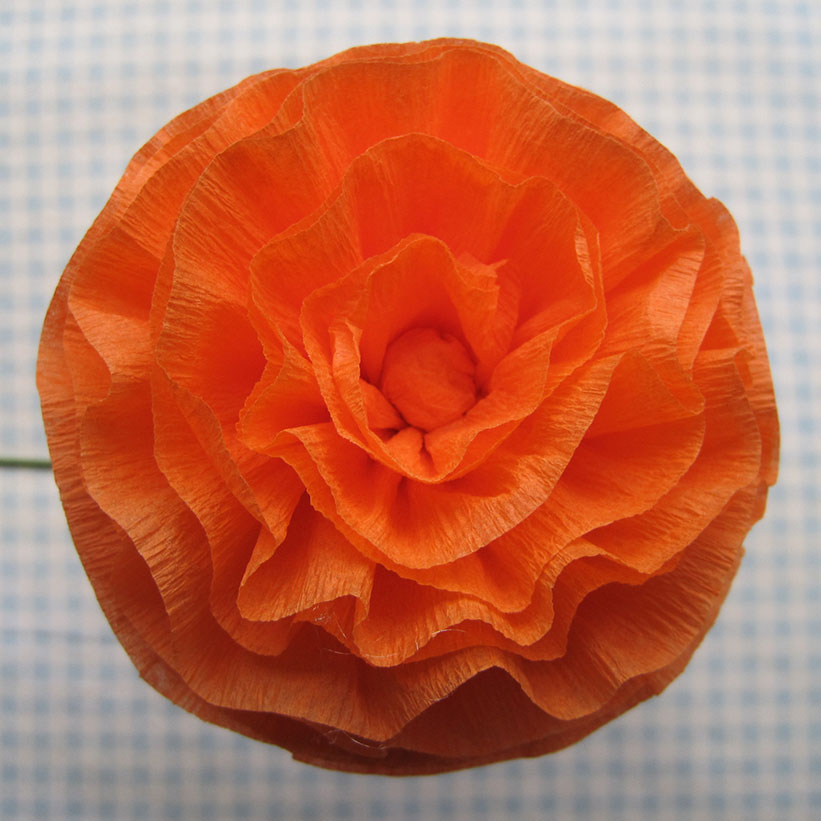
The completed flower.
Here are some additional designs. Any differences in the process above will be noted.
SIMPLE PUFFY FLOWER
This is the easiest flower and requires no cutting. Cut a length of streamer 12′ long and stretch the paper along one side, being careful not to pull too hard because streamers are sort of fragile and don’t stretch much. Fold the streamer in half and feed the double thickness through the ruffler on stitch length 3. Pull the two layers apart to make the flower puffier. Finish off as usual.
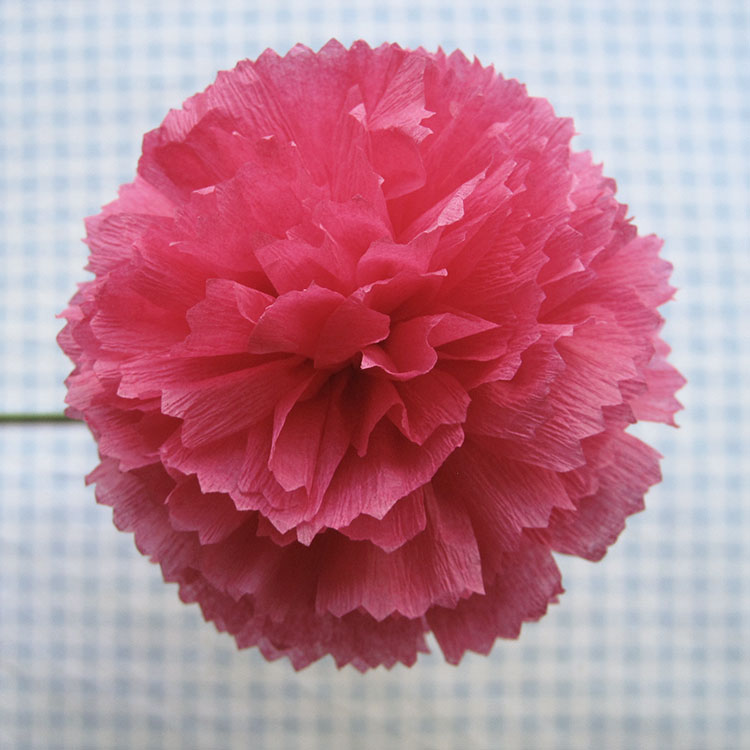
CARNATION
Cut a 12′ streamer and fold in half 3 times. Attach clips and cut the edge with pinking shears. Cut triangle shapes into the streamer to make individual carnation petals. Unfold and feed a single thickness through ruffler on stitch length 2 or 2.5. Finish as usual.
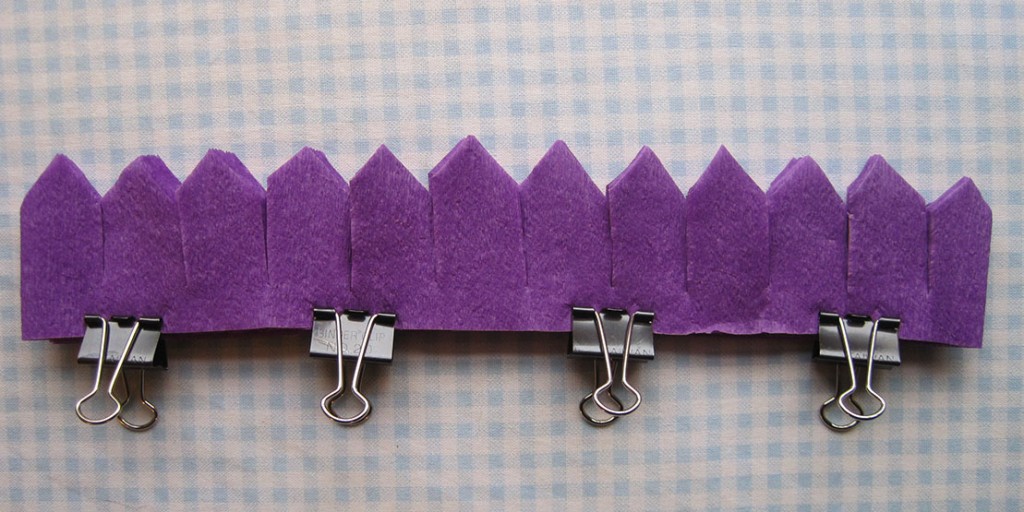
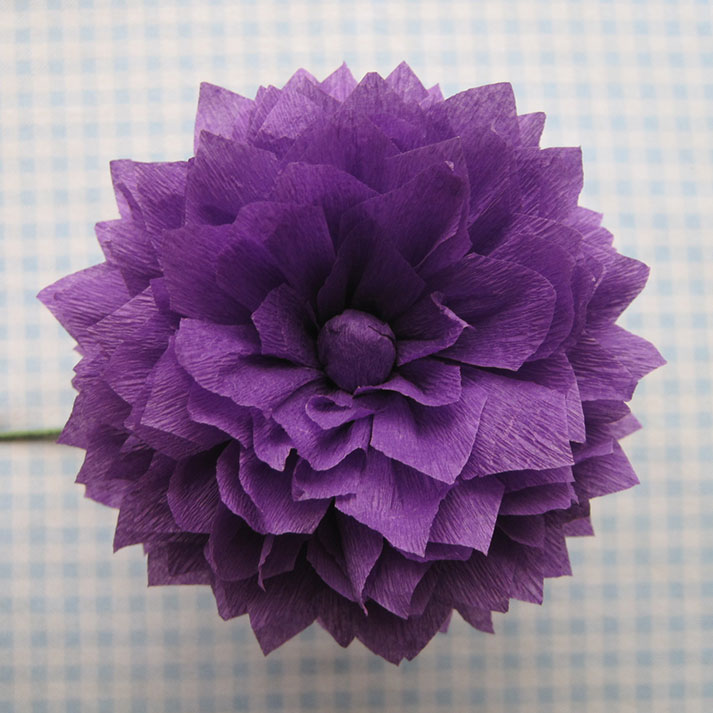
DAHLIA
Cut as shown below; then put together just like the carnation.
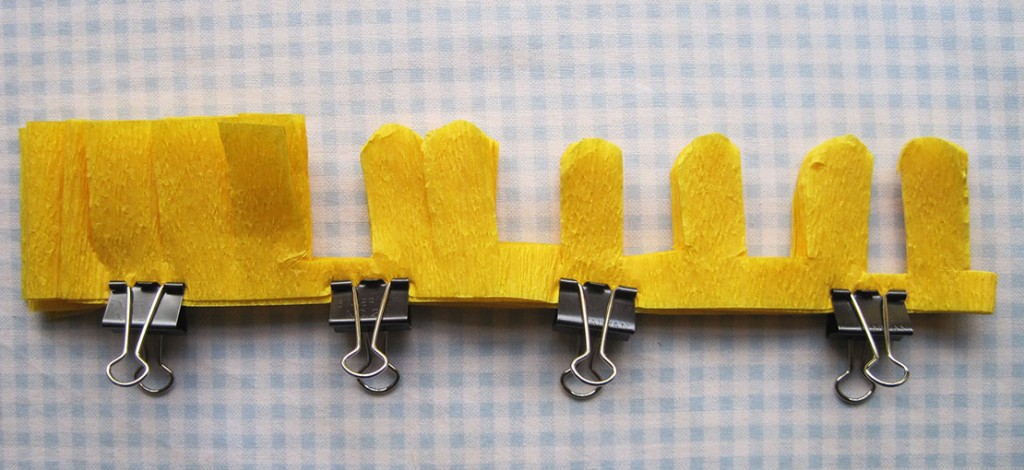
DAISY
Cut a 12′ length of streamer and fold as usual to 9″. Cut as below, only you might try not to make the mistake I did. There should be a space between each petal, but honestly it really doesn’t matter much at all. Unfold and cut the streamer in half (this makes two flowers). Run the first streamer through the ruffler on maybe 2 (these petals with spaces do better with a little less pleating). Go slowly and be careful not to catch your petals in the ruffler or they may rip.
More flowers tomorrow, including several using homemade duplex streamers. Click here to go directly to Part 2 of the tutorial.


Wow,. Amazing. So easy and so beautiful!
These look lovely. I really enjoy reading your blog – keep up the good work!
awesome explanations for so many types of flowers..thanks for sharing
Hi Martha, I was wondering if I could get permission to use one of your photos of paper flowers–is there another way to reach you?
I am so amazed with your site. And you have made it so easy to under. Which is awesome. Thank you so much x
superb!!
Wonderful tutorial! I’ve never used a ruffler foot before but I love the effect.
I’ll be getting a ruffler soon! I have lots of streamer rolls just waiting.
Thank you for the great post!
very good
Gorgeous. I’m a crafter who does paper-crafting mostly, so I don’t have a proper sewing machine, certainly not one with a ruffler. Now I’m inspired to get one though! 🙂
Thanks for posting this, and for answering my previous question – I’d found the 2nd part to this tutorial before seeing this 1st bit.
All the best
Kaye x
suas flores ficaram lindas, parabéns!